skip to main |
skip to sidebar
 The statuesque and beautiful Shannon, aka "Gigi", or more plainly "The Giraffe", asked for a special cake for her mom's birthday. Every year, Gigi plans an amazing day for her mom - brunch, pampering, special dinner... What a good daughter! Her mom had never had a "real" custom cake made for her - even for her wedding!! So this was going to be a sweet surprise for her.
Because her mom is such a lovely and feminine lady, Shannon asked for an equally lovely and "girly" cake... so we decided on a high-heel - in pink, of course!
After she picked the style of shoe and wording on the labels, I got started on making the shoe. I made cardboard templates of the sole and heel, based on the measurements of a 9x13" pan. I would be cutting the cake into thirds to layer it for the shoebox, so I needed to figure less than a third of each dimension for the shoe template.
Once the templates were made, I made the fondant and coloured it a soft rosy pink. Then I rolled it out, placed the templates on it, and used a pizza cutter to cut the shapes. I brushed glitter powder on the pieces to give the shoe a satin sheen.
I lay one of Bella's cups on its side because it was the perfect height for the heel and was evenly cylindrical, then slanted a cardboard square on its side to lay the sole on and create the slope of the shoe.
I shaped a heel around a skewer, and added a little square bottom to it in a darker shade of pink. I made the front piece and scrunched a ball of plastic wrap underneath it to keep it curved. I cut a brooch shape in white fondant, studded it with silver dragees, and placed it on the side. I let all the pieces dry for a week.
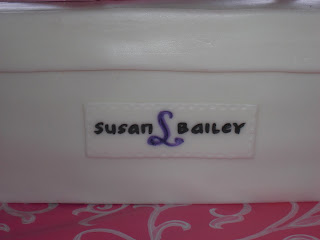
The shoebox was made of three layers of deep chocolate cake and fresh raspberry buttercream, then covered with sides and tops of white fondant. I had measured the final dimensions of the cake and made rectangular templates to cut the fondant, including extra strips on the top to make it look like a box top.
 So far so good, right? Haha.
When I stuck the heel into the top of the box, the extra height from the tip of the skewer snapped the sole in half. Yikes!! I quickly patched the break, but it still looked cracked. I ended up putting another layer of pink fondant on top to cover the break and reinforced the shoe. With stitch details around the perimeter, it ended up working nicely as the insole of the shoe. Disaster averted. Phew.
Last things to make were the labels, which I wrote with edible ink. Voila!
 When Shannon told me how much her mom loved the cake, and sent pictures of the celebration, I teared up. What an incredible honour it is to be part of someone's special day...a real blessing.
Happy Birthday, Mrs. Bailey! So glad you enjoyed your day!!
 Our little girl is 6!! Wow. I could go on forever about how much she has grown and developed, but that's for a different blog...I'll stick to cakes here! :)
For her birthday, B wanted a Littlest Pet Shop - themed cake. (Even though she didn't have a single LPS toy, Daddy had recently bought some LPS stickers for her Valentine, which she loved) So we looked online for ideas, and she just loved the little snail in www.cakejournal.com (a site I enjoy immensely!).
I pretty much followed the pictures online and created the snail completely out of fondant. The eyes had to be sufficiently goggly without being alien-like, which posed a bit of a challenge. After several tries with different sizes and placements, I think she turned out pretty cute.
 I originally planned on making the base of the cake look like a brown flower pot, so I spent way too much of my lifetime kneading cocoa powder into fondant to get it sufficiently brown. But upon looking at the cheery colours of the snail, I felt I had to make the pot more fun and girly, thus deciding on those happy polka dots on the base! Ahhh, much better. I guess I'll just slowly eat my way through that chunk of chocolate fondant...
But, wait a minute! It's still missing something... There's too much space on the top. Ooh!!! I'll make a tree with the brown fondant to give it an extra element. Right, then.
After several lame (literally) attempts to make a standing tree on the top with skewers, I decided on just making some "twigs" to place in the shape of the number 6 on the surface of the cake. (Clever girl! I'll just pat myself on the back there...) Of course, bare twigs won't do. Break out the flower and leaf-cutters! Et voila! An approximation of the cherry blossoms that bloom in the spring. Hmmm.... Snail, Six, Spring. By George, I think we've got it!!! Why, B's birthday just happens to be on the first day of spring! SSSerendipity.
 Happy Birthday, sweet girl. I love you BIG!!! :)
 Our sweet friend, Deepani (isn't she lovely?) has her birthday on December 31st (poor thing!). So a few mommy-group friends decided to surprise her with a cake when we got together at Chantal's house for an early evening New Year's eve gathering (very early...we all have little ones!). Of course I jumped and volunteered - on December 30th. Nothing like last-minute cake-making to get your blood-pumping! :)
Ok - so I made two sheet cakes...because I wanted to have square tiers, but I wasn't sure how many, or what dimensions.
I thought I'd show you what's left over. Hmmm...leftover cake in my house. Dangerous.

It had to be chocolate on chocolate (a girl's best friend next to diamonds and waterproof mascara), and because of the last minute aspect, I didn't relish the idea of covering it in fondant. So, I left it with stripey chocolate buttercream on top, spiky on tier #2, and "smooth" on the bottom. Ok - so I really need to work on my buttercream spreading technique. But this is why I use fondant normally. I can't make the darn frosting look pretty! Thus, I made some fondant flowers to pretty it up.
Here's the first rendition:
 And the final version, after agonizing over floral placement for far too long:
 Happy Birthday, Deepani! And Happy 2010 everyone!!
 Bella and I collaborated on this little creation for our family Christmas dinner. I made the cake, frosting (both chocolate, of course) and baby, and she did the rest (even thought of putting knife marks on the yellow part of the manger to indicate hay).
Bella loves those edible ink markers as much as I do...and now that she can write - she is ready to take over all future signage.
Happy Birthday, Jesus! Merry Christmas, everyone!
 Ahhh yes - time to break out the cutters and royal icing and glitter and assorted doodads!!! Made lemon sugar cookies - soft and chewy, rather than crisp, and not as sickly sweet as the traditional sugar cookies...though I won't turn those down if you're sharing...
 Ok - so apples are the traditional gift from student to teacher...usually rosy, shiny, red perfection.
Well...how about a green one (I always liked the tang of Granny Smiths!) with a little worm friend? (shows it's organic - pesticide free!!) To be completely honest, I decided on the green apple mostly because I had used up all the red for Lightning McQueen (see the post below), and of course, it also looked sharp and rather modern against the purple gift. That's my story and I'm sticking to it!
 This cake was for Bella's teachers - they had a surprise Staff Appreciation Luncheon a few weeks before the Christmas holidays.
Being a teacher myself, I recognize fully the need for caffeine...and thus made them a rich, dark chocolate cake with layers of mocha buttercream. (Thank you to my lovely neighbour, Andrea, for supplying the Italian espresso powder!) The apple is made of a cupcake with the same flavours.I also made a cheerful little rainbow thank you plaque with my new edible markers, rice paper and fondant.
 Here's the cake surrounded by many other delightful treats in the staff room. Yummmm!


